Creative White Balance in Lightroom CC (Make Your Travel Photos Feel Like They Felt)
Let’s be honest—most of us ignore white balance until something looks wrong. The sky turns green. The shadows go purple. And suddenly you’re scrolling through presets hoping one of them makes your photo feel “normal” again.
But here’s the thing: normal isn’t the goal. Not with travel photography. You’re not just trying to show what a place looked like—you’re trying to show what it felt like.
That’s where creative white balance comes in. It’s not just a technical fix—it’s one of the most powerful (and underrated) emotional tools in Lightroom CC. You can shift the entire mood of your photo—cooler, warmer, softer, bolder—just by adjusting two sliders. No filters. No plugins. No fake “looks.” Just your memory, your feeling, and a little intention.
The Tools — Temperature and Tint in Lightroom CC
White balance starts with two sliders—Temperature and Tint—and they do exactly what they sound like.
- Temperature shifts your image from blue (cool) to yellow (warm).
- Tint moves it from green to magenta.

That’s it. No complicated menu. No secret formula. These two tools are your color steering wheel, and they work the same whether you’re on desktop or mobile. It’s one of the few areas in Lightroom CC where the mobile app is just as powerful as the full desktop version.
So why do they matter? Because mood and memory are shaped by color. A cool blue cast can make a field feel calm and quiet, while a warm glow can bring back the heat of the sun on your skin. The sliders don’t just fix color—they shape how you remember the scene.
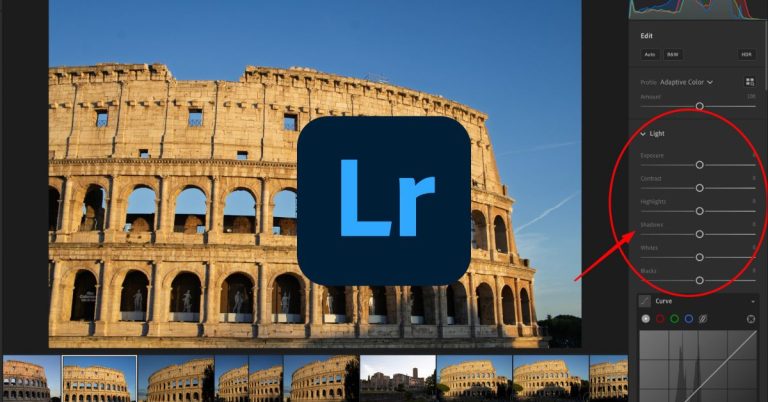
In the image below, you can see the Temperature and Tint sliders in Lightroom’s Edit panel. This is where every creative white balance tweak begins.
These two sliders are where the mood happens—same tool, whether you’re editing on a laptop or from a train platform.
“Accurate” vs. “Beautiful” — Know When to Break the Rules
Here’s the truth: if there’s no person in the photo, you don’t need to follow the white balance rulebook. You’re not correcting for skin tones. You’re not matching product labels or neutral grays. You’re telling a story—and stories run on mood, not math.

That means you can go bold. Drag the Temperature slider into the golden zone to bring back heat and memory. Nudge the Tint toward magenta if the scene felt dreamy or romantic. Or shift it cool and blue if the place felt quiet, lonely, or moody.
Landscapes, buildings, bridges, foggy mornings, empty piazzas—none of them care about “accuracy.” The camera’s white balance setting is just a default. You get to decide how the scene felt.
The image above is a great example. The original capture was more neutral, but by warming up the temperature and adding a little magenta tint, the photo suddenly feels richer, bolder, and more alive. Like it’s glowing from the inside out.
How to Build Emotion with Color
This is the part where white balance stops being technical and starts being emotional. You’re not just fixing a weird color cast—you’re creating a mood.

Here are a few simple tricks I use all the time to change how a photo feels:
- Cool blue: For quiet moments, early mornings, or anything that felt peaceful or a little lonely
- Peach/magenta: Great for dreamy sunsets, romance, or that “everything just slowed down” feeling
- Turquoise tint: Think tropical beaches, pools, anything that should feel bold and surreal
- Warm yellow-orange: Nostalgia in slider form—especially good for golden hour vibes
The best part? You don’t have to overthink it. Drag the sliders around and watch the mood change in real time. If it clicks—if you feel something—you’re doing it right.
Take the photo above. It’s not just blue because of the water—it’s blue because the moment felt cold, calm, and otherworldly. A warmer balance might have made it technically “correct,” but it would’ve lost all that atmosphere.
The Case for Editing White Balance First
White balance might seem like a color thing—but it actually shifts the entire tone of your photo. A warmer balance can make a scene feel brighter, lighter, and more emotional. A cooler balance? That can dull things down, pull out contrast, and add a layer of distance or mood.

That’s why I almost always start with white balance first, before I touch exposure, contrast, highlights, shadows, or any fancy tone curve stuff. If your color is off, the rest of your edits will be working against the vibe instead of building on it.
Start by asking: How did it feel? Was it glowing, golden, and a little nostalgic? Or cool, quiet, and maybe even a little surreal? Use the Temp and Tint sliders to dial that in first—then move on to the technical cleanup.
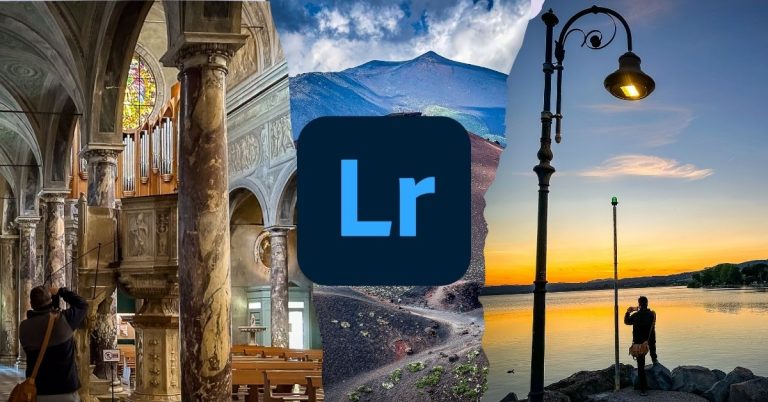
Below are two edits of different scenes. One is balanced cool, with soft light and a mysterious blue cast. The other leans warm, bright, and golden. They’re not just color choices—they’re emotional direction.
White balance sets the tone. One edit feels cinematic and quiet, the other glows like a postcard. Start with mood, then tweak the rest.
Creative White Balance Looks to Try
If you want to experiment, here’s your cheat sheet. Start with the original, then use the sliders to push the mood. These aren’t filters—they’re just feelings dialed in through color.
- Original vs. Blue-Tinted – for cold mornings or moody skies
- Original vs. Magenta-Sunset – makes golden hour feel more cinematic
- Original vs. Warm and Bright – turns an average scene into a nostalgic postcard
- Original vs. Pastel-Turquoise – surreal, dreamy, great for beaches or fog
Swipe, compare, and see what pulls you in. Better yet—try it yourself, post your favorite, and tag it with your edit.
What to Watch Out For (When It Doesn’t Work)
Creative white balance is awesome—until it’s not. It’s one of those tools where subtle can feel powerful… and pushing it too far can derail the whole image. Here’s how to know when it’s gone sideways:
- Avoid the green zone. Unless you’re editing a Matrix reboot, that greenish hue almost never looks good—especially in skies or skin.
- Watch skin tones. People don’t look great when you crank the magenta or blue too far. Even slight shifts can make faces look sickly or alien.
- Ask yourself: is this adding mood or stealing attention? If the color becomes the only thing you notice, it’s probably time to back it off.
Luckily, Lightroom gives you an easy out. You can always reset the white balance, undo a tweak, or isolate the edit using a brush or masking tool. There’s no shame in dialing it back.
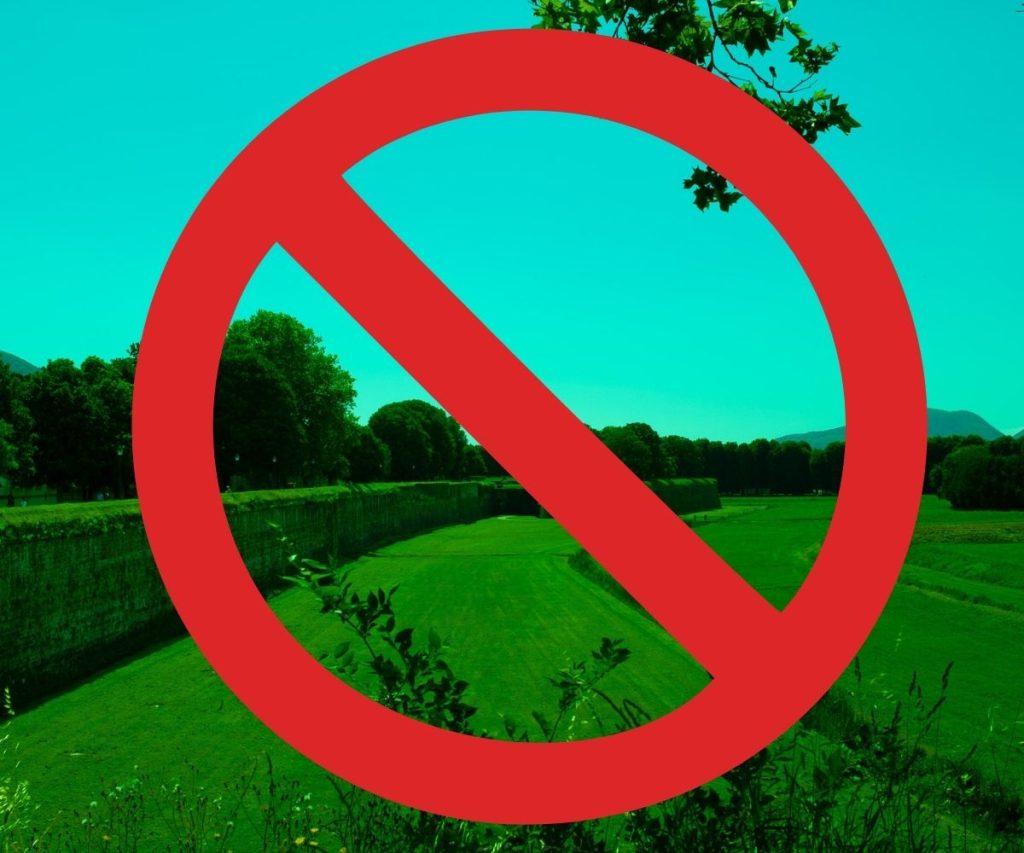
The photo above is exactly what happens when you overdo it. Too much tint, too much temperature shift—and suddenly a peaceful Tuscan scene looks like radioactive spinach.
Resetting, Undoing, and Playing It Safe
Worried about messing it up? Don’t be. Lightroom makes it nearly impossible to screw this up permanently.
Here’s how to test edits without fear:
- Double-click “WB” to instantly reset both Temp and Tint sliders
- Click “As Shot” to return to what your camera originally captured
- Hit Cmd+Z (or Ctrl+Z) to undo anything
- On mobile, use the back arrow or reset just the White Balance tool
Try everything. Undo anything. No risk. That’s the beauty of Lightroom.
Color That Tells a Story
In travel photography, your job isn’t to be a color scientist. You’re not capturing forensic evidence—you’re capturing feeling.
Maybe the moment was cold and quiet, like the air right before sunrise. Maybe it was golden and glowing, with that perfect end-of-day light spilling across old stone buildings. Or maybe it was weird—overcast, hazy, or filled with some color your camera couldn’t quite make sense of.
That’s where creative white balance becomes more than a technical tool. It becomes your memory dial. You can cool down a scene that felt still. Warm up one that felt alive. Add magenta to make it feel dreamy. Pull it back to say something more honest or raw.
No filters. No trendy presets. Just a simple way to get closer to how it felt to be there.
So next time you’re editing, don’t ask “Is this correct?” Ask, “Does this feel like what I remember?”
That’s the real goal.
Want more real-world photo tips from the road? Grab a copy of my book, Walking Through Tuscany, and see how color, light, and story come together—one step (and one slider) at a time.