How to Start Editing Travel Photos in Lightroom CC & Mobile
The hardest part of editing isn’t figuring out Lightroom. It’s convincing yourself to open it at all. After a long day of walking, navigating train schedules, or lugging a camera bag through cobblestone alleys, the last thing you want to do is sort through 273 photos of archways, cobblestone streets, and that one pigeon you thought looked majestic at the time.
You tell yourself you’ll edit later. Then later turns into weeks, and by the time you get home, you’ve forgotten where half the shots were taken—and your memory card is a mess of similar-looking alleys and out-of-focus pasta.
But here’s the thing. You don’t need to overhaul your whole workflow on day one. You just need to start. Lightroom CC & Mobile makes that easy, whether you’re editing raw files from your camera or syncing phone shots on the fly. Pick one photo. Hit Auto. Straighten the horizon. Try a preset. Done. It’s less about polishing a final gallery and more about building momentum while the trip’s still happening.
Three AI-Powered Starting Points in Lightroom CC
If opening Lightroom is the hard part, the second-hardest part is knowing where to start once you’re in. Luckily, Lightroom CC gives you a few AI-powered shortcuts that actually work—no YouTube deep dives or endless slider dragging required.
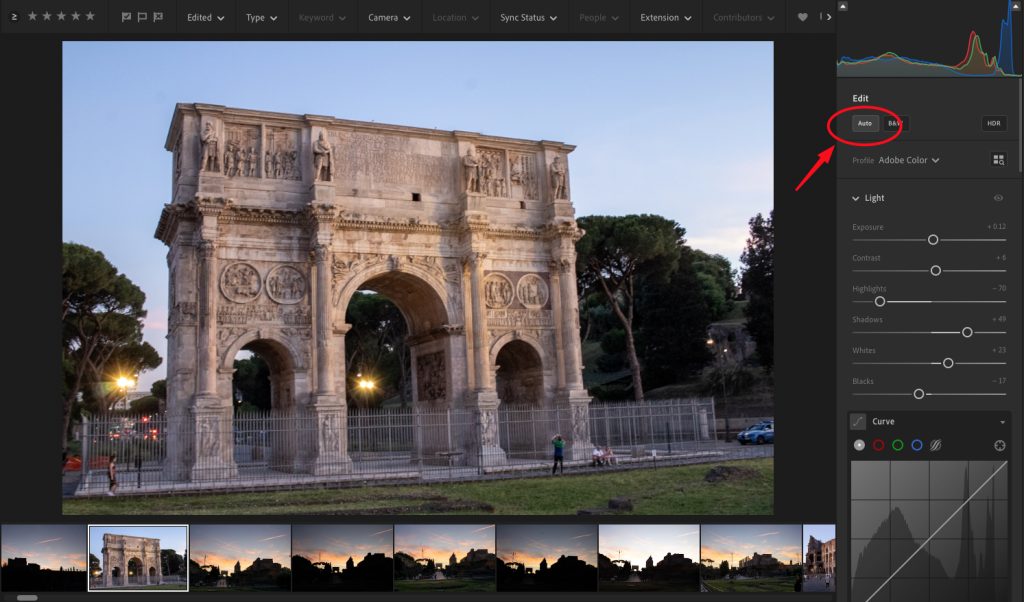
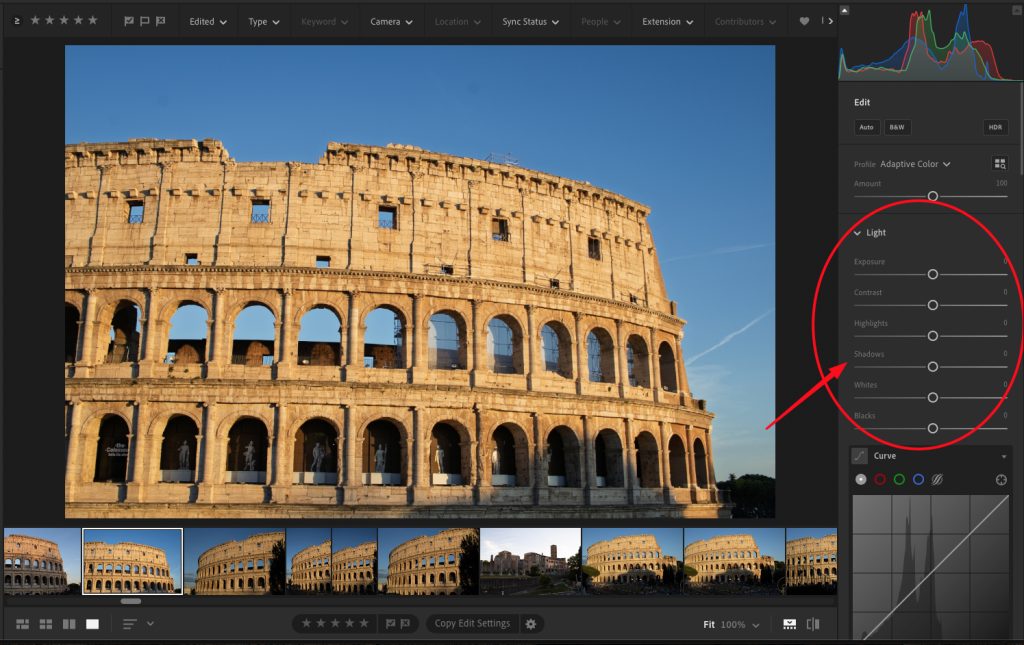
Auto is the quickest win. Tap it, and Lightroom adjusts exposure, contrast, highlights, and shadows based on the image. Sometimes it nails it. Sometimes it goes a little too bright. Either way, it gives you a solid baseline. You can tweak from there or leave it as-is and pretend you spent 20 minutes finessing the tones.
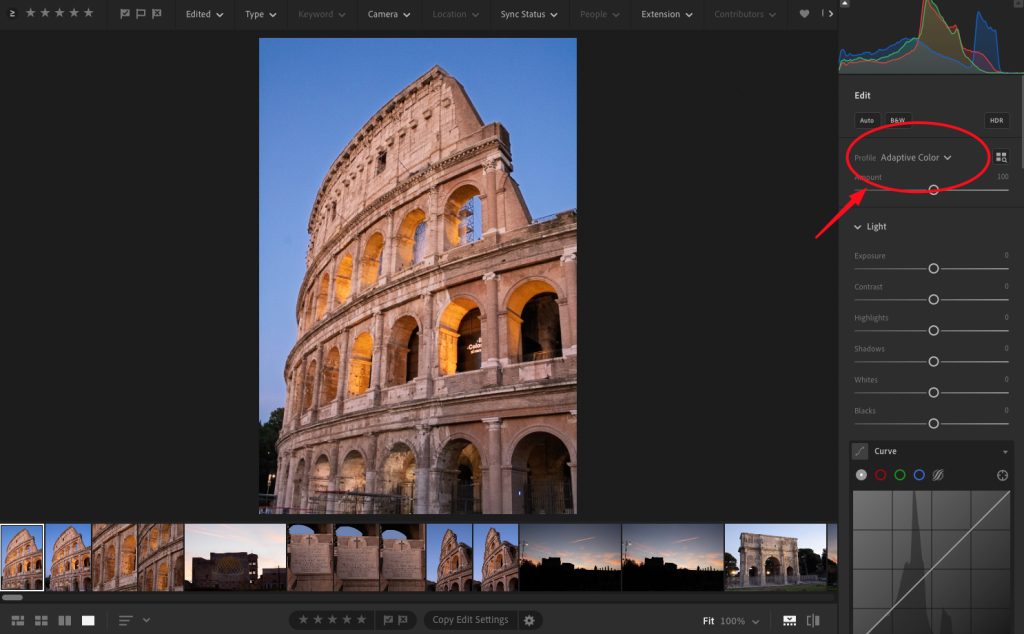
Adaptive Color is sneakier. It doesn’t touch your sliders at all—instead, it applies a smart profile that subtly enhances your image without you doing anything. It’s especially handy if you want your photos to feel a bit more vibrant or stylized without the work. You’ll find it under the Presets tab, usually labeled something like “Adaptive: Portrait” or “Adaptive: Travel.”
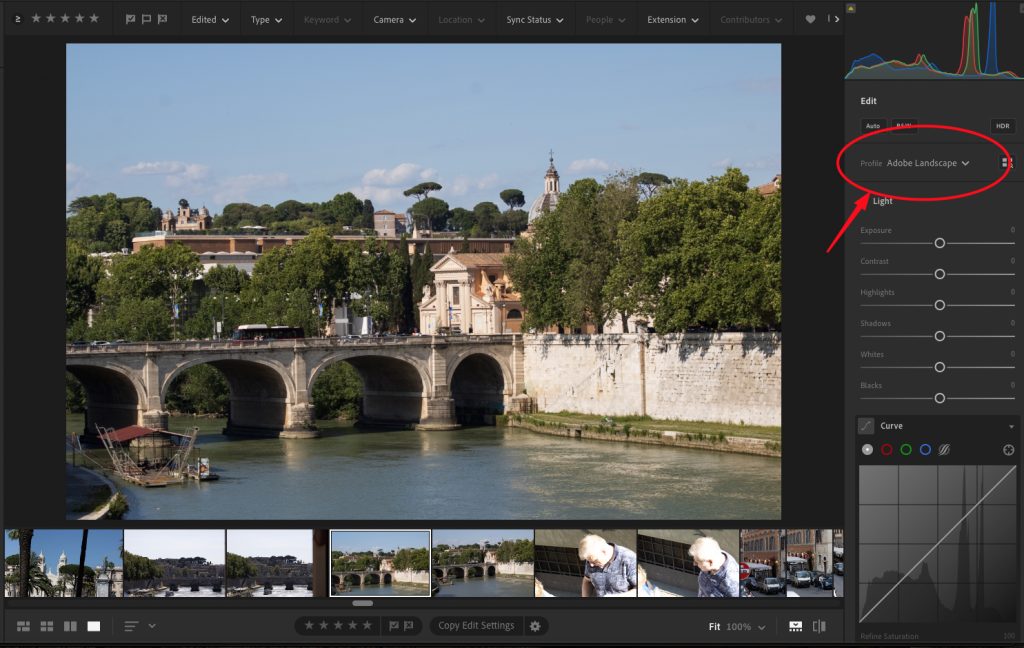
Adobe Landscape Profile is great if you’re shooting RAW from a camera and want your sky or greenery to pop. It’s more vivid than the default and a good pick when your photo looks flat or washed out straight out of the camera. You can apply it under the Profile menu before you even touch a single slider.
None of these are final edits—but they’re all easy ways to kick your brain into gear. Pick one, apply it, and suddenly you’re not stuck anymore. You’re editing.
Auto vs Adaptive Color – What’s the Difference?
At first glance, Auto and Adaptive Color might feel like they do the same thing—one-tap edits that make your photo look better fast. But under the hood, they work very differently, and knowing how can save you some serious editing headaches.
Auto is exactly what it sounds like. Lightroom uses AI to analyze your photo and adjusts the basic tone sliders—exposure, contrast, highlights, shadows, whites, and blacks. It’s like giving your photo a tune-up. You can see what changed because the sliders physically move, which is helpful if you want to learn from it or tweak each part manually afterward.
Adaptive Color, on the other hand, doesn’t touch your sliders at all. It works more like a preset built on AI smarts. You still get a noticeable change—often more punch or warmth—but all the sliders stay at zero. That means your editing tools are wide open, giving you total freedom to adjust without fighting against previous changes.
This is especially useful when you want a clean starting point that looks finished but leaves room for creative control. No slider math. No “what did Lightroom just do to my highlights?” moments. Just a better-looking photo with a blank canvas underneath.
So if you’re looking for quick edits you can build on, Adaptive Color is your friend. If you want to see exactly what Lightroom is adjusting, Auto gives you a peek behind the curtain.
Why Adaptive Color Gives You More Flexibility
Auto is great—until it boxes you in. Once those sliders are moved, you’re working from Lightroom’s idea of a good edit, not yours. Want to recover more highlights? Too bad, Auto already dragged them down. Need to brighten shadows? They’ve already been lifted halfway. You’re not starting fresh—you’re negotiating with a machine that already made decisions for you.
Adaptive Color flips that. It gives you the look of an edit without touching the tools. Your photo gets a smart, AI-driven polish, but all the sliders stay at zero. Which means you can push highlights, pull shadows, boost whites, or crush blacks with full range. Nothing’s been capped or pre-baked.
This matters most when you’re editing RAW files from your camera. Those files hold a ton of data, and you want as much wiggle room as possible. Adaptive Color lets you tap into that without Lightroom stepping on your toes. It’s like getting a running start without being shoved in a specific direction.
Even on mobile, this approach keeps things cleaner. You get a better-looking image right away—but with total control if you want to take it further later. No buried edits. No guesswork. Just a head start that still lets you drive.
What If You Don’t Like Auto or Adaptive
Not every photo needs an AI boost. Sometimes Auto feels too crunchy. Sometimes Adaptive Color goes too warm or stylized. If neither one clicks, there’s a solid third option hiding in plain sight: switch your Profile to Adobe Landscape.
It’s not AI-driven, which means no surprises. But it’s smarter than the default Adobe Color profile—especially if you’re editing RAW files from your camera. Adobe Landscape is built for, well, landscapes. Think wide skies, textured buildings, and natural scenes with a lot of contrast or subtle color.
The biggest difference? Shadows open up without blowing things out. Blues stay crisp. Greens feel more natural. It gives you a cleaner, more flexible starting point, whether you’re doing a full manual edit or layering on a preset.
You can find it under the Profile section at the top of the Edit panel. No sliders get touched. No changes happen until you start making them. It’s just a better default for outdoor travel photos—and it plays nice with your editing style, whatever that may be.
If Auto and Adaptive feel like shortcuts, Adobe Landscape feels like a well-paved trail. No flash, no fuss, just a good base to build on.
Why Adobe Landscape Is the Hidden Gem
Don’t let the name fool you—Adobe Landscape isn’t just for postcard mountains and rolling hills. It’s one of Lightroom’s most underrated tools for travel photography, even if your shot is more espresso bar than Everest.
Compared to the default Adobe Color profile, Landscape gives you a little extra punch right out of the gate. Colors feel richer. Contrast is stronger. Skies don’t blow out as easily, and shadowy areas lift without turning gray and muddy. It’s not a preset, and it doesn’t move any sliders. It just gives your RAW photo a better starting point.
This makes a big difference when you’re editing fast—on the road, between buses, or five minutes before your travel partner demands dinner. You don’t have time to build your edit from scratch every time. Adobe Landscape helps the image pop before you even start adjusting.
It also plays nice with presets. Since the contrast and color are already a bit more vivid, you’ll often need fewer tweaks afterward. Think of it as a quiet head start—no AI, no drama, just a better-looking base.
If you’ve been ignoring the Profile menu altogether, this is your sign to scroll up and give it a look. Adobe Landscape might not have the flashiest name, but it does a lot of heavy lifting behind the scenes.
What Works Best on Mobile Devices
The best part about Lightroom CC? You don’t need to be at a desk. All the tools we’ve talked about—Auto, Adaptive Color, and Adobe Landscape—work just as well on your phone or tablet as they do on desktop.
You can tap a profile, apply a preset, or fine-tune with the Amount slider in Adaptive Color—all while sitting on a train, waiting for pasta, or lying flat on a hostel bed wondering why your feet hurt so much. The interface is clean, fast, and shockingly powerful for a mobile app.
Want to change your Profile? Just scroll to the top of the Edit panel and hit Browse. You’ll see Adobe Landscape and others right there. Using Adaptive Color? Tap the preset, then use the Amount slider to tone it up or down. And Auto is always just one tap away under the Light section.
The experience on mobile isn’t watered down—it’s optimized. You get full-resolution editing, cloud sync, and access to all your RAW files if you’ve imported them. It means you can keep up with your edits as you travel instead of waiting until you’re home and overwhelmed.
So if you’re sitting there, scrolling Instagram instead of editing your own shots—open Lightroom. You’ve already got everything you need.
Let the AI Help—Then Take Over
You don’t need to figure everything out from scratch. Not when Lightroom CC gives you solid starting points that work—whether you’re editing on a train, in a hotel room, or halfway through a jet-lagged coffee.
Use Auto when you’re tired and just want something usable without thinking. Try Adaptive Color when you want a smarter look that still gives you full control. And when you’re shooting RAW and want a clean, vivid base to build on, Adobe Landscape quietly does the job better than most people realize.
The point isn’t to let AI do all the work—it’s to help you start strong, so you can finish with your own style. Whether that means dialing in shadows, adding your favorite preset, or just cropping out the part where your finger made it into the frame, you’re still the one making the calls.
Editing on the road doesn’t have to be all-or-nothing. These tools help you find that middle ground—quick, effective, and ready whenever you are.