How to Take Better Food Photos While Traveling
Travel isn’t just about cathedrals and coastlines—it’s about flavors. The salty crunch of prosciutto, the first sip of house wine at a plastic table, the surprise of a pistachio gelato in some forgotten village—that’s the stuff that sticks. And let’s be honest, food is often the highlight of the day (especially when the hike was terrible and the hotel had no hot water).
So why leave it out of your photos? You already stop to shoot doorways and sunsets—your pasta deserves the same treatment. Even if your travel partner rolls their eyes while you adjust your fork for the fifth time, they’ll thank you later when the memory outlasts the meal.
The Magazine Rule — Why Food Is Always Featured
Flip through any good travel magazine and you’ll see it: a close-up of pasta twirled just so, a market stall full of bread, or a glass of wine catching the light. Food always gets a feature. And for good reason—one meal can tell you more about a place than a full day’s itinerary.
Food is cultural shorthand. You don’t need a guidebook to explain prosciutto, pecorino, or a plate of fresh pasta. A photo of Tuscan charcuterie or Neapolitan pizza says Italy instantly. It’s not just what was on your plate—it’s where you were sitting, what time of day it was, and who you shared it with.

And don’t forget—meals are memory triggers. You’ll forget some churches and streets, but you won’t forget the chocolate tart from that tiny pasticceria in Lucca. So go ahead and shoot the plate. Your future self will thank you.
The Camera Technique — Zoom, Blur, and Backlight
Let’s be honest: nothing screams “tourist with a camera” like hovering over a full plate from two feet away. If you want your food photos to actually look good—like something from a travel magazine, not a Yelp review—it’s all about restraint and focus. Literally.
Instead of trying to capture the whole table, pick one detail. That curl of pancetta, a drizzle of olive oil catching the light, the crust edge of a perfectly charred pizza. Use a longer lens or zoom in with your phone to isolate that one element and let everything else fall softly out of focus.
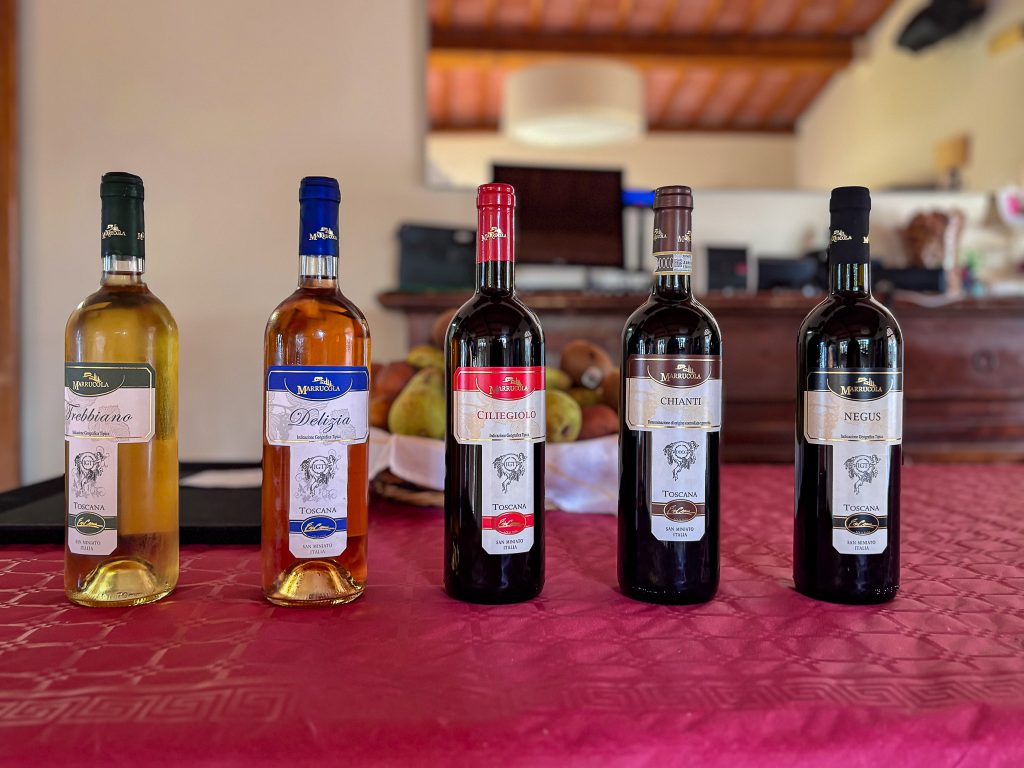
This wine tasting shot works not because it shows the whole room—but because it doesn’t. The bottles are lined up, the labels are sharp, and the depth of field pulls your eye exactly where it needs to go. You feel like you’re there, about to take that first sip.
- Open your aperture wide (low f-stop = more background blur)
- Focus on one detail, not the full table
- Pull your chair back and shoot from a distance
- Try vertical orientation for a more dynamic look (and to avoid the “menu photo” vibe)
Great food photos are less about showing everything—and more about making someone wish they could taste it.
The Light Trick That Changes Everything
Light is everything. You could have the most gorgeous plate of handmade ravioli in front of you, but if the lighting’s off, it’s going to look like something scooped from a cafeteria tray. Harsh shadows, weird tints, blown-out highlights—bad light turns good food ugly fast.
The fix? Scout your light like you’re scouting a photo shoot—because you are. Ask to sit near a window. Better yet, outside. If there’s an umbrella or awning, jackpot: soft, directional light without the glare. That’s the look food photographers pay to recreate in studios. You can get it for free with a good seat.

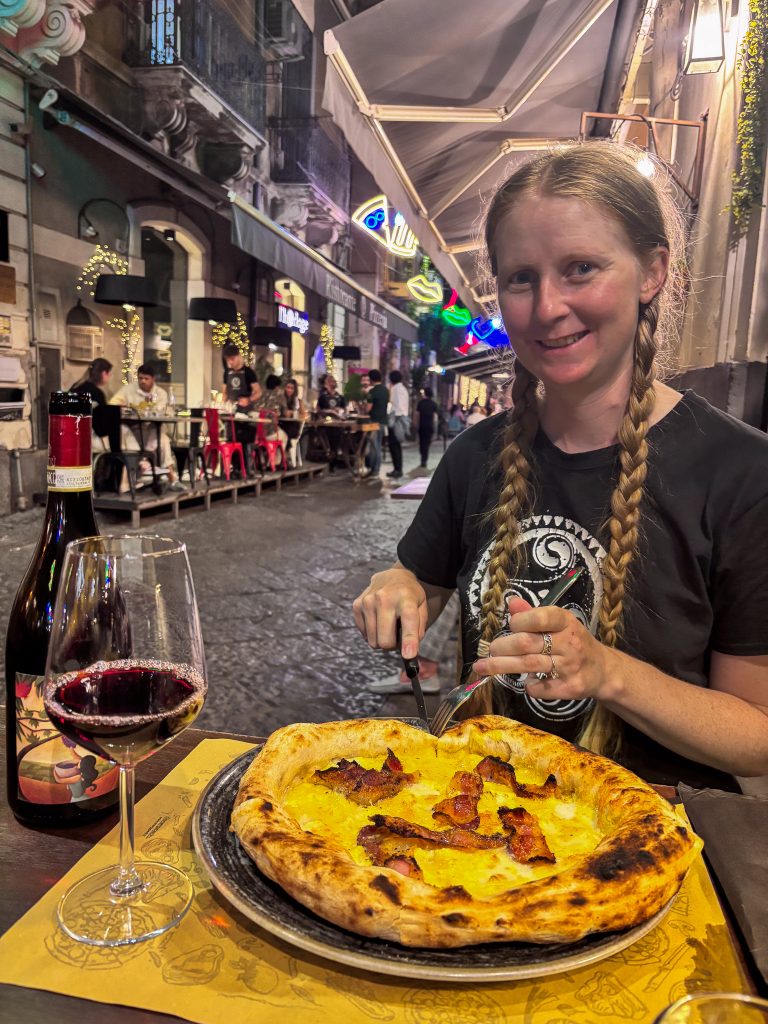
See how natural and balanced the light is in this shot? No harsh shadows, no weird color cast—just soft, even tones that make the wine glow and the pizza actually look appetizing. That’s the power of good outdoor light. Even with mixed backgrounds and a busy table, the whole scene feels real, warm, and inviting—unlike those yellow overhead bulbs that make food look sweaty and sad.
- Sit near a window or ask for a spot outside
- Umbrella shade = soft, even lighting
- Avoid sitting directly under harsh ceiling bulbs
- No natural light? Take the shot, but know your editing app’s doing the heavy lifting later
Good light doesn’t just flatter the food. It makes people want to eat it—and remember the moment.
The iPhone Hack — Shoot from Above Like a Pro
Some meals are made for the overhead shot—big spreads, shared plates, anything with a strong shape or color. It’s the quickest way to get a clean, organized image that looks like you actually knew what you were doing. And the iPhone has a hidden feature to help you nail it every time.
You’ve probably seen this in action: someone stands up, leans awkwardly over the table, and tries to frame the whole thing in one shot. What you don’t see is that their horizon is tilted, the wine glass is warped, and the lines are all off. Here’s how to fix that with a 30-second setup:
- Go to your iPhone Camera Settings
- Toggle Grid on (this also helps with general composition)
- Hold your phone directly overhead
- Two white crosshairs will appear—align them
- When they turn yellow, you’re perfectly level

This one change instantly upgrades your food photography game. No weird angles, no crooked glasses, no “why does the plate look like a trapezoid?” moments. Just clean, balanced, Instagram-worthy shots that let the meal shine.
Bonus tip: shoot quickly. Hovering with your arms raised like a drone isn’t a good look—and the food isn’t getting any warmer.
Real-World Tips to Keep it Fast
No one wants to eat cold gnocchi. That includes your travel companion, the waiter, and probably you. So if you’re going to photograph your food (and you should), do it quickly and with a little self-awareness. You’re not shooting for Bon Appétit. You’re documenting a memory—and dinner.
The best travel food photos aren’t styled to death. They’re fast, honest, and a little messy—in a good way. Don’t rearrange the olives or wipe the rim of the wine glass with a napkin. Shoot it how it was served. It’s more real, and it usually looks better that way.
- Take 2–3 quick shots, then put the phone down
- Don’t style the food like a photoshoot—just shoot what’s there
- Include the drink (wine, spritz, espresso—they’re part of the moment)
- Say thank you to your dining partner. Or at least let them take the first bite of dessert
Food photos don’t have to take over the meal. Done right, they just make it easier to remember it.
Make Room on the Camera Roll for Dessert
You don’t need a food stylist to get travel photos that make people hungry. You just need a little light, a little focus, and a willingness to pause for ten seconds before digging in. That’s it. No pretension. No tripod. Just a quick shot of what made the day memorable—before the memory disappears into crumbs and wine stains.
The truth is, food photos age better than your tan. You’ll forget how tired your legs were on that 12-mile walk, but you’ll remember the cacio e pepe that made it worth it. You’ll remember the cheap wine that turned out to be the best thing you drank all trip. You’ll remember the silence after dessert, when everyone was full and happy and just a little sunburned.
The next time you’re sitting at a table that feels like it matters—even if it’s plastic chairs on the side of a mountain—take the photo. It’s not just a plate of food. It’s a timestamp on your whole trip.
Want more travel tips like this? Grab the free 10 Bucket List Photo Destinations guide—perfect if you like to eat your way through a country and bring the memories home, one shot at a time.