10 iPhone Travel Photo Tips That Actually Work
I’m writing this five days after getting back from a two-month trip to Italy, and I can still picture the moment — standing outside the Pantheon in Rome, watching the light hit that ancient dome like a spotlight from the gods. Golden, glowing, textured… it was everything a travel photographer lives for.
My DSLR was slung around my neck. I had my 24mm lens on, ready to go. I lifted the camera — and saw a giant smudge. Inside the lens. I panicked, swapped to my telephoto… same cursed haze. Dust? Condensation? Divine sabotage? Whatever it was, my “real” camera was suddenly real-useless.
But you know what was ready? My iPhone.
I pulled it out, framed the shot, and captured one of my favorite images of the entire trip. No filters, no fuss — just the right moment and a camera that worked.
You don’t need pro gear to take great travel photos. You just need to know how to use the camera you already have. These are real tips that actually work.
1. Clean Your Lens (Seriously, Do It)

This is the tip everyone rolls their eyes at… until they see their “amazing” travel photo looks like it was taken through a stick of butter. If your photos are mysteriously foggy, hazy, or just plain soft — congratulations, you probably just smudged sunscreen across your lens five minutes earlier.
Your iPhone lens lives in your pocket, your bag, your sweaty hand — it’s a grime magnet. Before you take any photo, give it a quick wipe. Best option? A microfiber cloth. Most likely option? The bottom of your T-shirt. Both work. Just don’t use your beach towel or a slice of pizza.
This is literally the fastest, easiest way to improve your photo quality. Don’t believe me? Look at the side-by-side image in this post. One was shot with a smudged lens. The other was taken immediately after cleaning it. It’s night and day.
So yeah, clean your lens. It takes two seconds, and your photos (and future you) will thank you.
2. Use Better Light, Not More Gear

You don’t need a $3,000 camera to take beautiful photos — you just need better light. Seriously. Light is everything. If you shoot a street corner at noon, it’ll look flat, harsh, and kinda lifeless. Shoot that same spot at golden hour — just after sunrise or before sunset — and boom: cinematic magic. Everything glows. Skin looks amazing. Buildings pop. Strangers will think you’re a professional. (You can let them.)
Midday sun? Not your friend. It’s too strong and creates those weird raccoon-eye shadows on faces. If you’re stuck shooting mid-afternoon, find some open shade, a building overhang, or even use shadows creatively — they can actually make a shot look pretty cool if you lean into it.
Bonus: Tap your screen to set focus and adjust the exposure by dragging your finger up or down. It’s like manual mode without the headache. Brighten things up if it looks too dark — or lower the exposure for moody, rich tones.
3. Turn On the Grid and Frame With Purpose

If you’ve ever taken a photo and thought, “Why does this look… off?” — it might be a composition thing. Luckily, your iPhone has a built-in tool to fix that. It’s called the grid, and it’s criminally underrated.
Head to Settings > Camera > Grid and flip that switch on. Boom. Now you’ll see two vertical and two horizontal lines when you open the camera — this is the rule of thirds in action. The idea? Don’t just plop your subject in the center. Place them where the lines intersect for a more interesting, professional-looking photo. It’s simple, but it works.
Shooting a skyline? Keep the horizon on the bottom third, not dead center. Taking a portrait? Put the person’s eyes along the top third. Want a killer food shot? Align the plate off-center, and make sure it’s not tilted like it’s about to slide off the table.
Oh — and please keep your verticals straight. Crooked buildings make viewers tilt their heads like confused puppies.
Natural frames (doorways, trees, arches) can also make your shot feel layered and intentional. So frame it, shift it, tweak it — and make it feel right.
4. Stop Zooming. Just Don’t.

If I could ban one feature on iPhone cameras, it’d be digital zoom. That little pinch gesture we all do? Yeah, it’s ruining your photos. Digital zoom doesn’t actually “zoom” — it just crops in and stretches the pixels like a low-res security cam screenshot. The result? Grainy, mushy, sad-looking images that not even Lightroom can rescue.
Instead, use the lenses your phone actually has. If you’ve got a dual or triple-lens iPhone, stick to the built-in 1x or 3x (telephoto) options — those are real optical lenses. Everything in between is digital fakery. Want a closer shot? Move your feet. Or shoot wide and crop later. You’ll retain more sharpness, color, and detail that way.
Also, don’t fall for the “10x zoom!” marketing hype unless you want your photo to look like it was faxed from space. Physics hasn’t changed — digital magnification is still just pixel-stretching.
Bottom line: your legs are better zoom than your phone. Walk a few steps forward, reframe, and your photos will instantly look better. Promise.
5. Tap to Focus + Lock It In

Letting your iPhone choose the focus is like asking a dog where to put your furniture — it’ll pick something, but probably not what you had in mind.
Instead, tap on the thing you actually care about. Want that espresso cup sharp? Tap it. Want your friend’s face crisp instead of the tree behind them? Tap them. That little yellow box that pops up? That’s your focus lock. Easy.
For tricky lighting (like a sunset or a dark café), tap and hold to lock both focus and exposure. You’ll see “AE/AF Lock” pop up at the top of the screen — now your phone won’t randomly shift focus or blow out the highlights when something moves.
Bonus move: Once you’ve tapped, slide your finger up or down to adjust the exposure manually. Brighten it a bit for more detail, or darken it to save highlights and make colors pop. This is especially helpful for sunsets, food, and anything backlit.
Bottom line? Don’t let your phone guess what’s important. Tap with purpose. Lock it in. Shoot with intention.
6. Use Portrait Mode… Even for Stuff That Isn’t Portraits

Portrait Mode isn’t just for faces. In fact, some of my favorite iPhone shots have zero people in them. Food, wine glasses, flowers, doorways — they all look amazing when you give them that creamy background blur. Suddenly your lunch looks like it belongs in a magazine. (Or at least in your group chat with “oooh where is that??” comments.)
Here’s the trick: After you take the shot, open it in your Photos app and tap Edit — you’ll see the little f-stop number at the top. Slide that to adjust how blurry the background is. Higher number = less blur. Lower number = dreamy bokeh vibes. It’s surprisingly customizable for a phone.
One warning though: sometimes Portrait Mode gets confused. It might blur out the edge of a coffee cup or make someone’s ear look like it’s melting. Just zoom in and check before you post — or retake the shot with a little more space between your subject and the background. The more separation, the cleaner the effect.
No humans required. Just depth, light, and a bit of creativity.
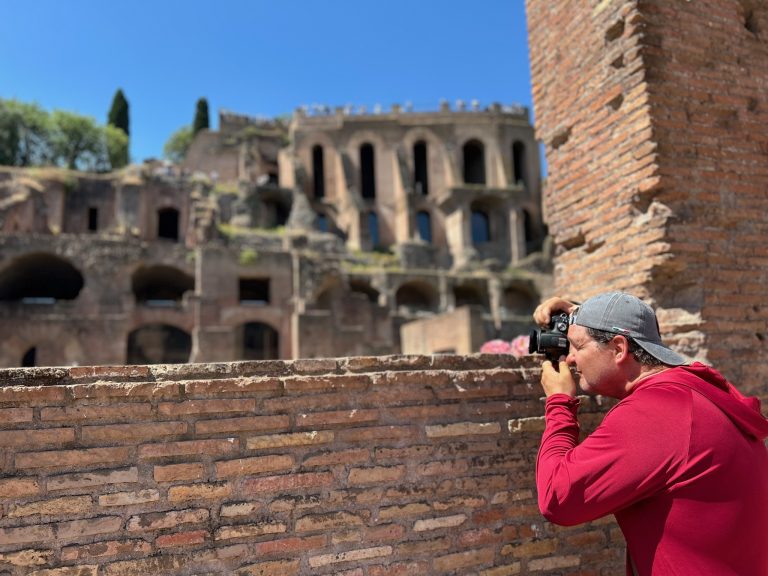
7. Play with Angles and Framing

If all your travel photos are taken from standing height with your phone held straight out — well, they’re probably fine. But they could be so much better. Want more depth? More interest? More “wait, you took that with your phone?” vibes? Change your angle.
Get low. Like, awkwardly crouch in the street low. Shoot from the ground and let cobblestones or puddles lead the eye. Or hold your phone up high and angle it down for a bird’s-eye feel. Little shifts make a big difference.
Foregrounds are magic. Frame your shot through a window, behind a café chair, between flowers, through an archway — anything that adds depth and layers. It pulls the viewer into the scene and makes it feel more real.
And don’t sleep on reflections. Look for puddles, mirrors, windows, sunglasses — they’re everywhere and they instantly double the visual interest. Same goes for shadows and leading lines — stairs, fences, sidewalks — anything that guides the eye into your photo.
Great composition isn’t complicated. You just have to move your feet, bend your knees, and look at things a little differently.
8. Shoot More Than Just Landmarks

Sure, that famous cathedral is impressive. So is the view from the castle, the plaza, the bridge. But scroll through your camera roll in five years — it’s not the postcard-perfect shots you’ll care about. It’s the weird mural on the alley wall. The laundry flapping above a street vendor’s cart. That neon-pink fruit stand with the woman slicing mangoes like a magician.
Shoot the everyday stuff. The details most people walk past. Street signs, doorknobs, doorways, sidewalk tile, market stalls, bar menus, flower pots, even piles of fruit. These little scenes capture the feel of a place, not just what it looks like on Google.
And honestly? These photos age better. Landmarks are everywhere. But the way the light hits that blue-painted wall or the tiny espresso bar tucked under a stairwell? That’s your memory. That’s a story. That’s the kind of image that makes people say, “Wait, where was this?”
So yes, get your landmark shot. Then turn around, wander a little, and photograph what makes the place feel alive.
9. Take Better Photos of People

People shots don’t have to be awkward or staged — you just need a little thought and a decent cup of coffee. Literally. Props help. Give someone a gelato, a map, a glass of wine, or a big sunhat, and suddenly they look like a travel magazine cover instead of someone saying, “Wait, what do I do with my hands?”
Framing matters: don’t cut off feet, knees, or foreheads. Give your subjects a little breathing room. Leave space above their heads, watch those limbs, and pay attention to what’s going on in the background (hint: trash cans don’t make good photo buddies).
Want candids? Use burst mode. Press and slide the shutter button to the left — don’t just tap it — and your iPhone goes full machine gun. It’ll fire off a rapid series of shots, and later you can scroll through and easily pick out the ones you want and delete the rest. In the Photos app, it’ll even handle the cleanup for you — just hit “Keep Only Favorites” and the extras vanish. Easy peasy. It’s perfect for street scenes, movement, or catching that fleeting real-life expression without saying a word.
Natural, relaxed, and human — that’s what you’re after.
10. Edit, Don’t Overdo It

Editing your photos? Yes. Turning them into radioactive, over-sharpened messes?
Please no.
The goal of editing is to enhance what’s already good — not bury it under filters and fake drama. I recommend using Lightroom Mobile (free, powerful, doesn’t try to turn your photo into a cartoon). Start simple: bump up the exposure if it’s too dark, add a little contrast for depth, and nudge the vibrance to make colors pop without going full neon.
If you want a consistent vibe across your photos (great for blog posts or Instagram grids), consider using presets. You can make your own or grab some online — just avoid the ones that crank everything to 11. The best edits are the ones that don’t look edited.
And yes, I know the iPhone has built-in filters. But most of them scream “I edited this at the airport Starbucks.” You can do better — subtle is stronger.
Shoot well, then polish lightly. That’s the trick.
11. (Bonus) Take Fewer, Better Shots

Let’s be real — you don’t need 47 nearly identical photos of the same pasta dish. Or 30 versions of that one alleyway “just in case.” The secret to great iPhone travel photos? Slow down. Shoot less. Shoot better.
Learn what your phone can actually do before you’re in the middle of a piazza with a confused waiter waiting on your order. Spend 15 minutes at home messing with Portrait Mode, exposure, and burst. That way, when the good light shows up — or something magical happens — you’re ready.
And when you are out and about, pause before you shoot. Look around. Check your light. What’s in the background? Is there something cooler two steps to the left? Good travel photography isn’t about taking a million photos — it’s about noticing the right moments and actually composing them.
You’ll save space, you’ll shoot with more confidence, and you’ll end up with a gallery that tells a story — not just a camera roll of duplicates.
You don’t need the newest iPhone. Or the fanciest lens. Or a suitcase full of gear. You just need good light, a little intention, and some practice. That’s it.
Great travel photography isn’t about tapping the shutter 1,000 times — it’s about noticing things. Framing them. Waiting half a second longer before you shoot. It’s about seeing, not just snapping.
So here’s your challenge: Spend one full day shooting with just your iPhone. No DSLR, no pressure, no tech excuses. Look for the light. Find details. Frame with purpose. And when you’re done, go through your shots and see what you created.
You might be surprised. You might be proud. And best of all, you might finally realize that the best camera really is the one you’ve already got.
Shoot less. See more. Share better.