How to Use Presets in Lightroom Mobile (Step-by-Step Guide for iPhone Photographers)
Ever scroll through someone’s perfect travel photos and wonder, how does it all look so good? The colors pop, the sky glows, the skin tones are perfect, and somehow it all feels effortless. It’s not magic. It’s presets.
Lightroom Mobile presets are one of the fastest ways to get pro-level edits straight from your phone—no laptop, no complicated sliders, no spending hours trying to “figure out the look.” Whether you’re shooting sunsets in Mazatlan or grabbing café shots in Cuenca, presets can turn your okay photo into something scroll-stopping in seconds.
This post is for real-world travelers—iPhone photographers editing in planes, cafés, hotel beds, and the back seat of buses. You don’t need a fancy camera or editing degree. Just a phone, the Lightroom Mobile app, and a few smart tips to get started.
What Are Presets, and Why Should You Use Them?

Let’s start with the basics: a preset is a saved set of editing adjustments—things like brightness, contrast, color temperature, saturation, shadows, and more. Instead of manually tweaking every photo from scratch, you tap one preset and boom—those edits are instantly applied.
Think of it like a photo filter, but way more powerful and way more customizable. Unlike Instagram filters (which often flatten your image or go full drama), Lightroom presets are built to enhance your photo without destroying it. You can still adjust every setting after applying it, so you’re always in control.
For travel photographers—especially those working with limited time or editing on the go—presets are a total lifesaver. They give you:
• Speed – One tap, instant results.
• Consistency – Your whole trip has the same visual style or vibe.
• Mood – Warm vintage? Clean & crisp? Bold colors? You pick.
Let’s say you’re editing photos from your Italy trip. One preset can tie together the golden Tuscan fields, moody Sicilian alleys, and bright Rome cafes with a cohesive look. Suddenly, your travel story feels like one journey, not a mix of random edits.
The catch? Presets are a starting point. They’re not a one-tap magic fix. Lighting, colors, and details vary between shots, so you’ll often need to fine-tune the results. But that’s the beauty of it—presets get you 80% of the way there, and you can take it home from there.
Choosing the Right Preset for the Right Photo

Not every preset works on every photo—and that’s totally normal. The key is learning how to “read” your photo before you tap a preset. Is it warm or cool? Soft or punchy? Bright or moody? Once you get a feel for what the image wants to be, choosing the right preset becomes way easier.
Start by looking at the light.
If it’s a golden-hour shot with warm tones, try a preset that enhances that glow—something with soft contrast, lifted shadows, and a warm color temperature. On the flip side, cooler presets work better for cloudy scenes, urban shots, or blue-hour images.
Think about the mood.
A beach photo might call for something light and airy. A bustling market scene could look better with deeper tones and richer contrast. Night photos? Go with something clean that doesn’t boost noise or over-saturate the colors.
Test, compare, and trust your gut.
Try a few different presets on the same image. Lightroom Mobile lets you preview them before applying, so tap around and see what works. You can even duplicate the photo and test a few looks side-by-side before committing. If one feels “off,” it probably is.
Common mistakes to avoid:
• Using a high-contrast preset on a foggy or soft-lit photo (kills the vibe)
• Applying a super warm preset to a scene that’s already orange (hello, neon skin)
• Using a vibrant color preset on a photo with harsh shadows — makes things look chaotic
Bottom line: presets are tools, not rules. The more you play with them, the better your instinct will get. Matching the preset to the photo makes the final image feel intentional, not random—and that’s the secret to edits that actually look pro.
How to Install Presets in Lightroom Mobile
Getting presets into Lightroom Mobile used to be clunky—especially if you didn’t have access to the desktop app. But in 2025, Adobe’s made it easier than ever. Whether you’re downloading a single free preset or importing a full pack, you’ve got options.
Using .DNG Presets (No Desktop Needed)
This is hands-down the easiest way to install Lightroom presets if you’re working straight from your phone—no laptop, no nonsense.
Download the preset (.DNG file)
You’ll usually get this from an email, Dropbox link, or download page. It looks like a photo, but it holds all the preset data.
Save the DNG to your Files app
Tap “More” or “Download” when prompted, and save the file to a folder you’ll remember—like “Lightroom Presets.”
Import it into Lightroom Mobile
Open the Lightroom app, tap Add Photos, then choose From Files. Navigate to your saved DNG and import it. It’ll show up in your library like a regular image.
Turn it into a preset
Tap the imported photo, then hit the three-dot menu (top right) and choose Create Preset.
Name and organize it
Call it something useful like Italy Warm Tones or Golden Hour Glow. Save it to a group like “Travel Presets” so you can find it later.
That’s it. Your preset is now saved and ready to use on any photo in your library—with just one tap.
How to Apply a Preset to Your Photo (Step-by-Step)
Once your presets are loaded into Lightroom Mobile, using them is quick—and honestly kind of addictive. Here’s how to get started with just a few taps.
Open Lightroom Mobile and tap on the photo you want to edit.
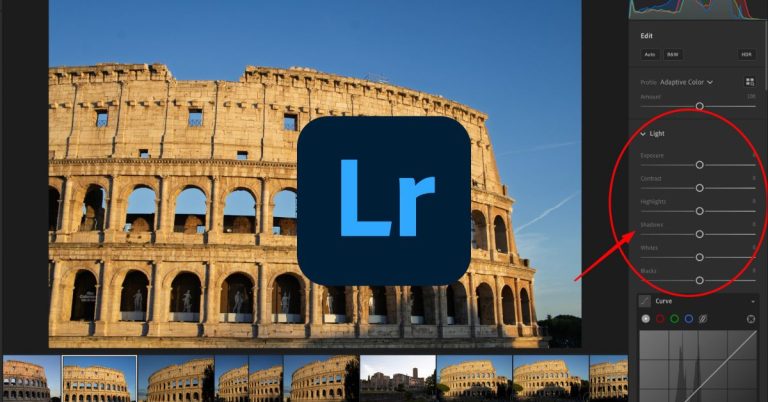
At the bottom of the screen, tap Presets (look for the two overlapping sliders icon, bottom left).
Navigate to the “Yours” tab and open the group where your preset lives—like “Italy Trip” or “GS Travel Pack.”
Tap on different presets to preview how each one looks. Don’t worry—it won’t apply until you hit the checkmark.
When you find one you like, tap the checkmark in the corner to apply it.
Now comes the important part: fine-tuning. Presets get you close, but no preset works perfectly on every photo. Lighting changes, colors vary, and sometimes the vibe just needs a tweak.
• Adjust exposure if the image feels too dark or too bright
• Use white balance sliders to fix overly warm or cool tones
• Fine-tune contrast or shadows to bring out more detail
Bonus: Tap into Masking to brighten a face, recover a blown-out sky, or add subtle pop to just one part of the shot. You can also use Remove (Healing) to clean up distractions like trash or photo bombers.
The key? Think of the preset as a launchpad—not the finish line. One tap starts the look. A few smart tweaks make it your photo.
How to Use Presets Without Overdoing It

Presets are great—but overdo it, and your photos start looking like they came out of the same toaster filter. Here’s how to use them well without making every shot feel overly processed or copy-paste.
First, always adjust exposure and white balance after applying a preset. These two settings are totally dependent on your lighting conditions, and presets can’t predict that. A quick nudge brighter or a cooler tint can make a huge difference.
If skin tones look too orange, red, or washed out, jump into the Color Mix (HSL) panel. Tweak the reds, oranges, or yellows individually—just a little goes a long way toward making people look like people again.
Remember: not every preset works on every photo. That dramatic sunset preset? Probably not great for a cloudy street scene. Use them like seasoning—not a sauce. Start subtle and adjust from there.
When you find an edit you really love, save it as your own preset. Tap the three-dot menu > Create Preset. This builds your personal style over time and keeps you from relying on someone else’s look forever.
Lightroom lets you add a custom watermark during export. Want your name, logo, or handle on each shot? Save it once, and it’ll auto-apply every time you post.
Building a Preset Workflow
Once you find a few presets you like, build them into your editing routine. It’s not just about saving time—it’s about cutting down decision fatigue. You know that feeling when you open a photo and don’t even know where to start? A solid workflow solves that.
Try this process:
Import → Flag favorites → Apply preset → Fine-tune → Export.
Start by importing your photos into an album. Swipe up to “Pick” your best shots, skip the rest. Then apply a preset to each favorite—not to finish the edit, but to give yourself a strong visual starting point. From there, tweak the exposure, white balance, and details as needed. Done? Export and move on.
The benefit? You’re not reinventing the wheel every time. You’ve got a repeatable process, a visual language, and less staring at sliders wondering what to do next. Whether you’re editing five shots from Chile or fifty from Sicily, a preset workflow keeps you moving—and makes every edit feel more intentional.
Batch Editing with Presets on Mobile
One of the best time-savers in Lightroom Mobile? Batch editing. If you’ve got a bunch of photos from the same spot—like a golden-hour shoot in Rome or a string of cappuccino shots in Florence—there’s no need to start from scratch every time.
Instead, apply your preset to one photo, then tap the three-dot menu in the top-right corner and select “Copy Settings.” Choose which edits to include (like Light, Color, Effects), then tap Done.
Next, go to any other photo (or multiple photos in Grid View), hit the three-dot menu again, and tap “Paste Settings.” Just like that, you’ve got the same polished look applied across the set.
Want to go even faster? Lightroom also lets you auto-apply a preset during import. When adding photos to an album, tap the “•••” menu and choose a preset to apply right away. This is huge for speeding up your workflow—especially if you’ve got a whole trip folder ready to go.
Batch editing = less screen time, more time exploring. And your feed still looks dialed in.
How to Create Your Own Preset in Lightroom Mobile
One of the best ways to build your style and speed up your editing? Create your own presets. It takes less than a minute—and once it’s saved, you’ve got your favorite look ready to reuse any time.
After you’ve finished editing a photo you love, tap the three-dot menu in the upper right corner and select “Create Preset.” This brings up a checklist where you choose which adjustments to include: Light, Color, Effects, Detail, Masking—whatever you’ve changed.
Give your preset a clear name (like “B&W Punch” or “Soft Skies”) and save it to a custom group, such as “Italy 2025” or “Sunset Edits.” Organizing your presets this way makes them easier to find later when you’re in a hurry.
That’s it. Your custom preset is now available in the Presets panel under the “Yours” tab—ready to apply across your whole photo set, or tweak slightly depending on the scene.
Creating your own presets is how your edits start to feel intentional and unique. Over time, they’ll reflect your eye, your trips, and your version of the story.
Presets Are a Shortcut, Not a Crutch
Presets can seriously change the game for mobile editing. They speed things up, help your photos feel consistent, and give you a creative starting point that’s way better than staring at sliders from scratch.
But they’re not magic—and they’re definitely not one-size-fits-all. Lighting, color, and context matter. That’s why the best edits come from using a preset and knowing how to tweak it. Think of them as your go-to seasoning: great when used right, but you still need to taste the dish.
The fun part? You don’t have to stick with someone else’s look. Start creating your own. As you keep editing, you’ll figure out what you like—whether it’s high contrast, warm tones, soft shadows, or punchy blues. Save those looks as your own presets and build a style that feels like you.
Try a few. Make a few. Use them. Break them. That’s the whole point.