7 Tips to Take Your Lightroom Mobile Editing to the Next Level
So you’ve got a great photo on your iPhone—but the edit? Kinda meh.
We’ve all been there. The light was perfect, the scene was stunning, but once you open it in Lightroom Mobile, it just doesn’t pop like you imagined. That’s where these tips come in.
Lightroom Mobile isn’t just a watered-down version of the desktop app—it’s a powerhouse editing tool for travelers, creators, and everyday phone photographers who want their photos to stand out without dragging a laptop around. Whether you’re posting to Instagram, building a photo book, or just leveling up your vacation shots, these tips will help you move from basic edits to professional-looking results—right from your phone.
1. Set Your White & Black Points Like a Pro
Want that clean, dynamic look without over-editing? Start by setting your white and black points.
Here’s the quick version: your white point sets the brightest parts of the image, and your black point sets the darkest. Nailing both helps your photo feel more balanced, less flat, and way more professional—even before touching anything else.

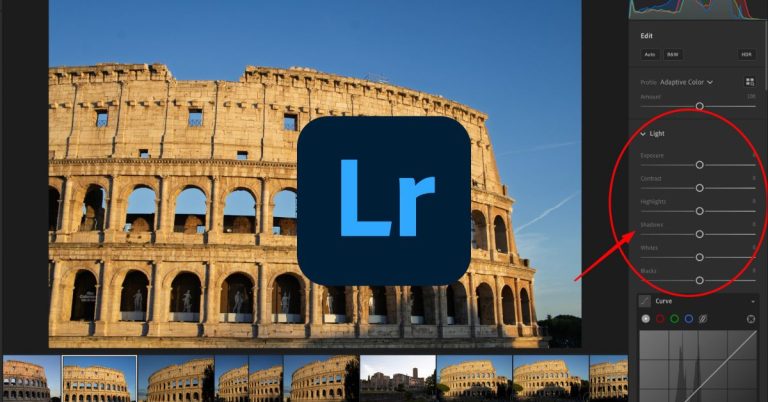
In Lightroom Mobile, there’s a simple trick to do this right:
Go to the Light panel, then tap and hold the Whites slider with one finger. While still holding, use another finger to touch the image and slide the value left or right. The screen will show you when the highlights start clipping (usually with colored warnings). Stop just as the white areas begin to appear—that’s your white point.
Now do the same with the Blacks slider to set the darkest parts.
This two-finger technique gives you visual feedback, so you’re not guessing. It’s fast, it’s precise, and it’s one of the easiest ways to make your photos look instantly more polished.
2. Isolate & Control Colors with the Color Mix Tool
If you’ve ever seen an edit with perfect teal skies or rich golden skin tones and wondered, How’d they do that? — this is it.
The Color Mix tool in Lightroom Mobile lets you target specific colors in your photo and dial in the exact hue, saturation, and luminance you want. And the real game-changer? The bullseye icon (aka the targeted adjustment tool).

Here’s how to use it:
- Head to the Color panel, tap Mix, then hit the bullseye icon in the top middle.
- Press and hold anywhere on your photo (like the sky or a jacket).
- Drag your finger up or down to change saturation, or left/right to shift hue.
Want your blue skies more teal? Tap the sky and shift the hue. Want to mute distracting greens? Tap the grass and drag the saturation down. Need warmer skin tones? Select the face and boost luminance or saturation subtly.
This tool is where stylized, signature looks start taking shape. It’s how you get those pro-level vibes—without touching a desktop.
3. Use Vignettes to Draw Attention to the Subject
Vignettes sometimes get a bad rap—like they’re a leftover trick from the early Instagram days—but when done right, they’re one of the easiest ways to guide the viewer’s eye where you want it to go.
A vignette is a soft darkening (or lightening) around the edges of your photo. It pulls visual focus inward, subtly spotlighting your subject without shouting look at this!

Here’s how to use it in Lightroom Mobile:
- Head to the Effects panel and scroll to Vignette.
- Move the slider left to darken the corners, right to brighten (light vignettes can work great for high-key photos).
- Use Midpoint to control how far into the frame the vignette reaches (lower = tighter spotlight).
- Adjust Feather to control the softness (higher feather = more subtle transition).
- Tweak Roundness to match your subject — people often work best with rounder vignettes, landscapes with wider ones.
Pro tip: Keep it subtle. If someone notices your vignette before they notice the subject, it’s too strong. But just a little? It’s like adding a quiet frame that tells your viewer where to look.
4. Get Precise with AI-Powered Masking
If you’re ready to level up your mobile edits, masking is where things get real. It’s the difference between a quick filter and a truly professional touch. And yes—it’s one of those features in Lightroom Mobile that’s absolutely worth the upgrade to the premium version.
Masking lets you apply edits to specific parts of your photo without affecting the whole thing. Want to brighten just the sky? Sharpen a face? Desaturate the background while keeping your subject punchy? Masking is the tool for that.

Here’s how to use it:
- Tap the Masking icon (in the toolbar next to Light/Color).
- Choose from tools like Select Subject, Select Sky, Brush, or Linear Gradient.
- Lightroom’s AI-powered tools will do the heavy lifting—automatically detecting faces, skies, and more.
- Once your mask is created, you can edit exposure, color, clarity, etc., just in that area.
It’s like Photoshop-level precision, without needing a computer.
Pro tip: Use masking to correct problem areas before applying a preset—or to fine-tune one after. It’s how you keep your photo balanced, stylized, and still feeling natural. If you’re serious about storytelling through edits, this is the tool that sets your photos apart.
5. Use the “Quick Reset” Trick
Ever start dragging a slider, get a little too bold, and suddenly your photo looks like a radioactive mess? Don’t panic. Lightroom Mobile has a built-in trick for moments like this—and it’s one of the most underrated features in the app.
Just double-tap any slider circle to instantly reset it to zero.
That’s it. No hunting for a tiny “reset” button, no dragging the slider back with shaky fingers trying to find the middle. Whether you’re adjusting exposure, contrast, white balance, or sharpening, this move gets you back to baseline in one tap.
Why it matters: Editing is all about experimenting. You want to try wild changes sometimes, just to see what happens. But if undoing those changes is clunky or slow, you stop playing—and that’s where creativity stalls.
This tiny tip keeps your workflow fast and fearless. Try something. Hate it? Double-tap. Move on. Simple. Smart. A total game-changer, especially when editing quickly on your phone.
6. Preview Before & After Without Leaving the Edit
Want to see how far you’ve come without jumping out of the editing screen? Lightroom Mobile makes it easy—and it’s surprisingly satisfying.

Just press and hold the photo while editing to toggle between the original (before) and your current version (after). Let go, and you’re right back to where you left off.
This simple gesture gives you a quick reality check. Are your changes actually improving the photo? Is the vibe still on track, or did you go too far with that saturation slider?
It’s also super motivating. Seeing the original image next to your polished version reinforces your progress and helps guide your next steps. If something’s not working, you’ll spot it fast. If everything looks good, you’ll feel it in your gut.
Whether you’re tweaking one photo on a plane or batch-editing a dozen in a café, this tip keeps your process focused and intentional—without breaking your flow.
7. Create Your Own Preset from Any Edit
Once you’ve nailed a look you love—don’t lose it. Save it as your own custom preset and make your future edits 10x faster.
Here’s how: After editing a photo in Lightroom Mobile, tap the three-dot menu in the top right and select “Create Preset.” You’ll get a checklist of everything you can include—light, color, effects, even masking.
Give your preset a name that actually means something (like Golden Hour Italy or Muted Rainy Day), and organize it into a group such as “2025 Travels” or “Warm Portraits.” That way, you’ll always know where to find it.
This is how your style starts to evolve. The more you save edits you love, the more you’ll develop your own visual identity—based on your taste, your locations, and your version of the story.
Over time, your preset library becomes your signature. Not someone else’s downloadable pack. Yours.
Bonus Tip: Apply a Preset to Multiple Photos at Once
If you’ve got a bunch of photos from the same spot—say a golden-hour stroll through Siracusa or a café series in Catania—there’s no reason to edit each one from scratch. Lightroom Mobile makes batch editing easy.

Here’s how:
- Edit your first photo and get it looking just right.
- Tap the three-dot menu in the top-right and select “Copy Settings.”
- Choose which adjustments to include (like Light, Color, Effects), then tap Copy.
- Head back to your library, select the other photos you want to edit, tap the three-dot menu, and hit “Paste Settings.”
Just like that, your preset is applied across all your photos. It’s perfect for photo sets shot in the same lighting, with the same vibe, or in the same scene.
This trick saves time, keeps your edits consistent, and helps your gallery look like it was all part of the same story. Whether you’re creating a blog post, Instagram carousel, or just cleaning up your camera roll—it makes everything feel dialed in without the extra effort.
Bonus #2: Stack These Tips Into a Workflow
Knowing tips is great—using them together is even better. The real editing magic happens when you build a workflow that’s repeatable, fast, and fits your style. Here’s a simple one to try next time you open Lightroom Mobile:
Import → Flag Favorites → Apply Preset → Fine-Tune → Export
Start by importing your photo set from a trip, shoot, or afternoon walk. Then swipe through and flag your favorites—skip the clutter, focus on the keepers. From there, apply a preset to get a solid base look. Use the Quick Reset and masking tools to fine-tune your edit, isolate colors, adjust light, and add any final touches.
Once it looks right? Export and move on.
This kind of workflow reduces decision fatigue, speeds up editing, and helps you develop a consistent visual style over time. The more you do it, the more second-nature it becomes. Editing on your phone doesn’t have to be chaotic or random—it can be focused, fun, and even a little satisfying.
Edit Smarter, Not Harder
Small techniques can make a huge difference—especially when you’re editing on the go. Whether it’s dialing in your white and black points, using AI masking to perfect a sky, or simply learning to double-tap for a reset, these Lightroom Mobile tips are all about control, speed, and style.
The best part? You don’t need fancy gear or hours behind a screen. Just a few smart habits, right from your phone, can take your images from “pretty good” to “damn, that’s solid.”
Next time you’re editing a batch of travel photos—on a plane, in a coffee shop, or killing time before dinner—try stacking a few of these tricks together.
Good editing isn’t about filters. It’s about flow.